I’ll cut to the chase here. I’m not going to talk about review methods to help you spot errors in your document. This is about the other side of proofreading – what to do once you find mistakes and how to clearly communicate the changes to the document’s creator.
I know it seems simple but there’s always room for improvement. Here are a few simple tips to smooth out the process:
1. Track who makes changes
Ideally, there should be more than one person involved in the proofreading process. (You know… fresh eyes and all that.) Sometimes with committee run projects, you may have four or more people involved in the review.
Unless all parties involved have identifiable handwriting, it can be difficult to know who made which changes. If you’re unable to decipher what the markup is or if you disagree with an edit, you’ll waste time canvassing the office to find the author.
2. Use (fun) coloured ink
There’s a simple solution to the “who wrote what” dilemma: erasable, coloured ink pens.
I happened across my first Pilot FriXion Erasable Pen a few years ago. Available in ten colours, these gel ink pens are a proofreader’s dream and a bit of a throwback to middle school.
Each proofreader involved can use a different colour, ideally signing their name on the front page (or last page) of the document so it’s known who made the notes. Best of all, if there’s a disagreement about a change there’s no need to scratch everything out and scrawl “STET” over the mess (that’s Latin for “let it stand”, in case you were wondering).
If a change is overridden, it can just be erased. It keeps the page tidier and creates less confusion when it comes time for the designer or document creator to make the final changes.
3. Be consistent
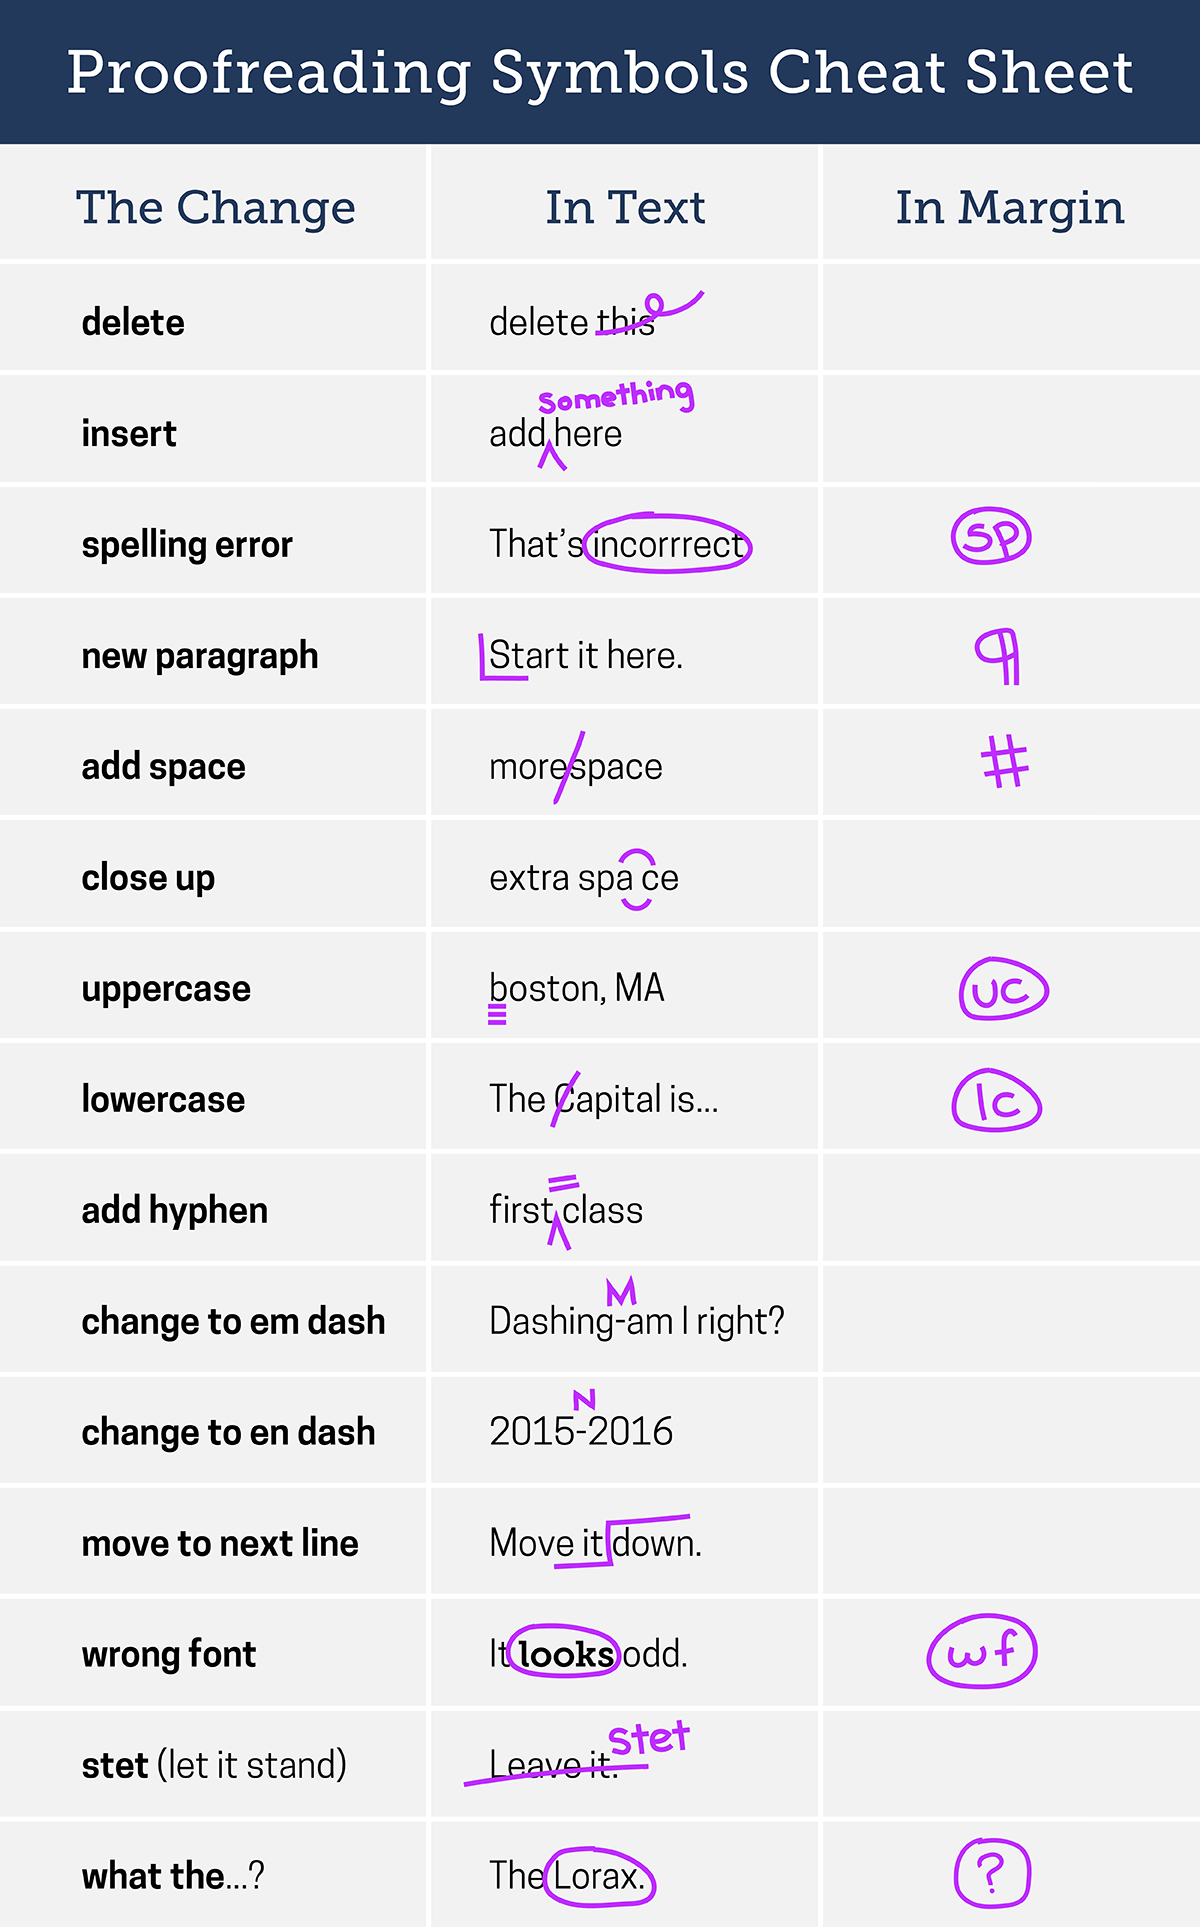
Create clarity by using a standard system for marking up text. There are standards guides floating around the internet so pick one and circulate it to your fellow proofreaders for all to use.
Here’s a mini-guide on some of the most common markups:

A few more things to consider:
-
- If you’re unable to pass on the original marked-up hardcopy to whoever is making the edits, scan in a colour copy and email it to them. Avoid faxing whenever possible – the quality and colours will be compromised.
- Don’t make changes on post-its and attach them to the page. They tend to fall off after a few page shuffles. Use them as temporary notes for yourself as your work through a document but make sure they’re gone before handing it off to the next person.
Go digital with proofreading
You can avoid the mess of pen scrawls altogether by using software, such as Adobe Acrobat, to markup the document. This method allows multiple users to make comments and keeps everything together in one handy PDF file.
This process is recommended for documents that have already been professionally laid out (like a brochure or annual report) and not for the early draft editing. For more on how to use Adobe Acrobat for proofing, check out my post here.
